How to Model a Simple BPMN Flow using Camunda Modeler

This post contains a step-by-step guide on how to create a simple BPMN flow using Camunda Modeler.
- Getting Started
- Code Example
- Step 1: Create a New BPMN Diagram
- Step 2: Save the BPMN Diagram
- Step 3: Set Process Properties
- Step 4: Name the Start Event
- Step 5: Create and name the Task
- Step 6: Change Task Type to Service Task
- Step 7: Set the Task Properties (General)
- Step 8: Set the Task Implementation
- Step 9: Create End Event
- Remember: Save the Process
- Summary
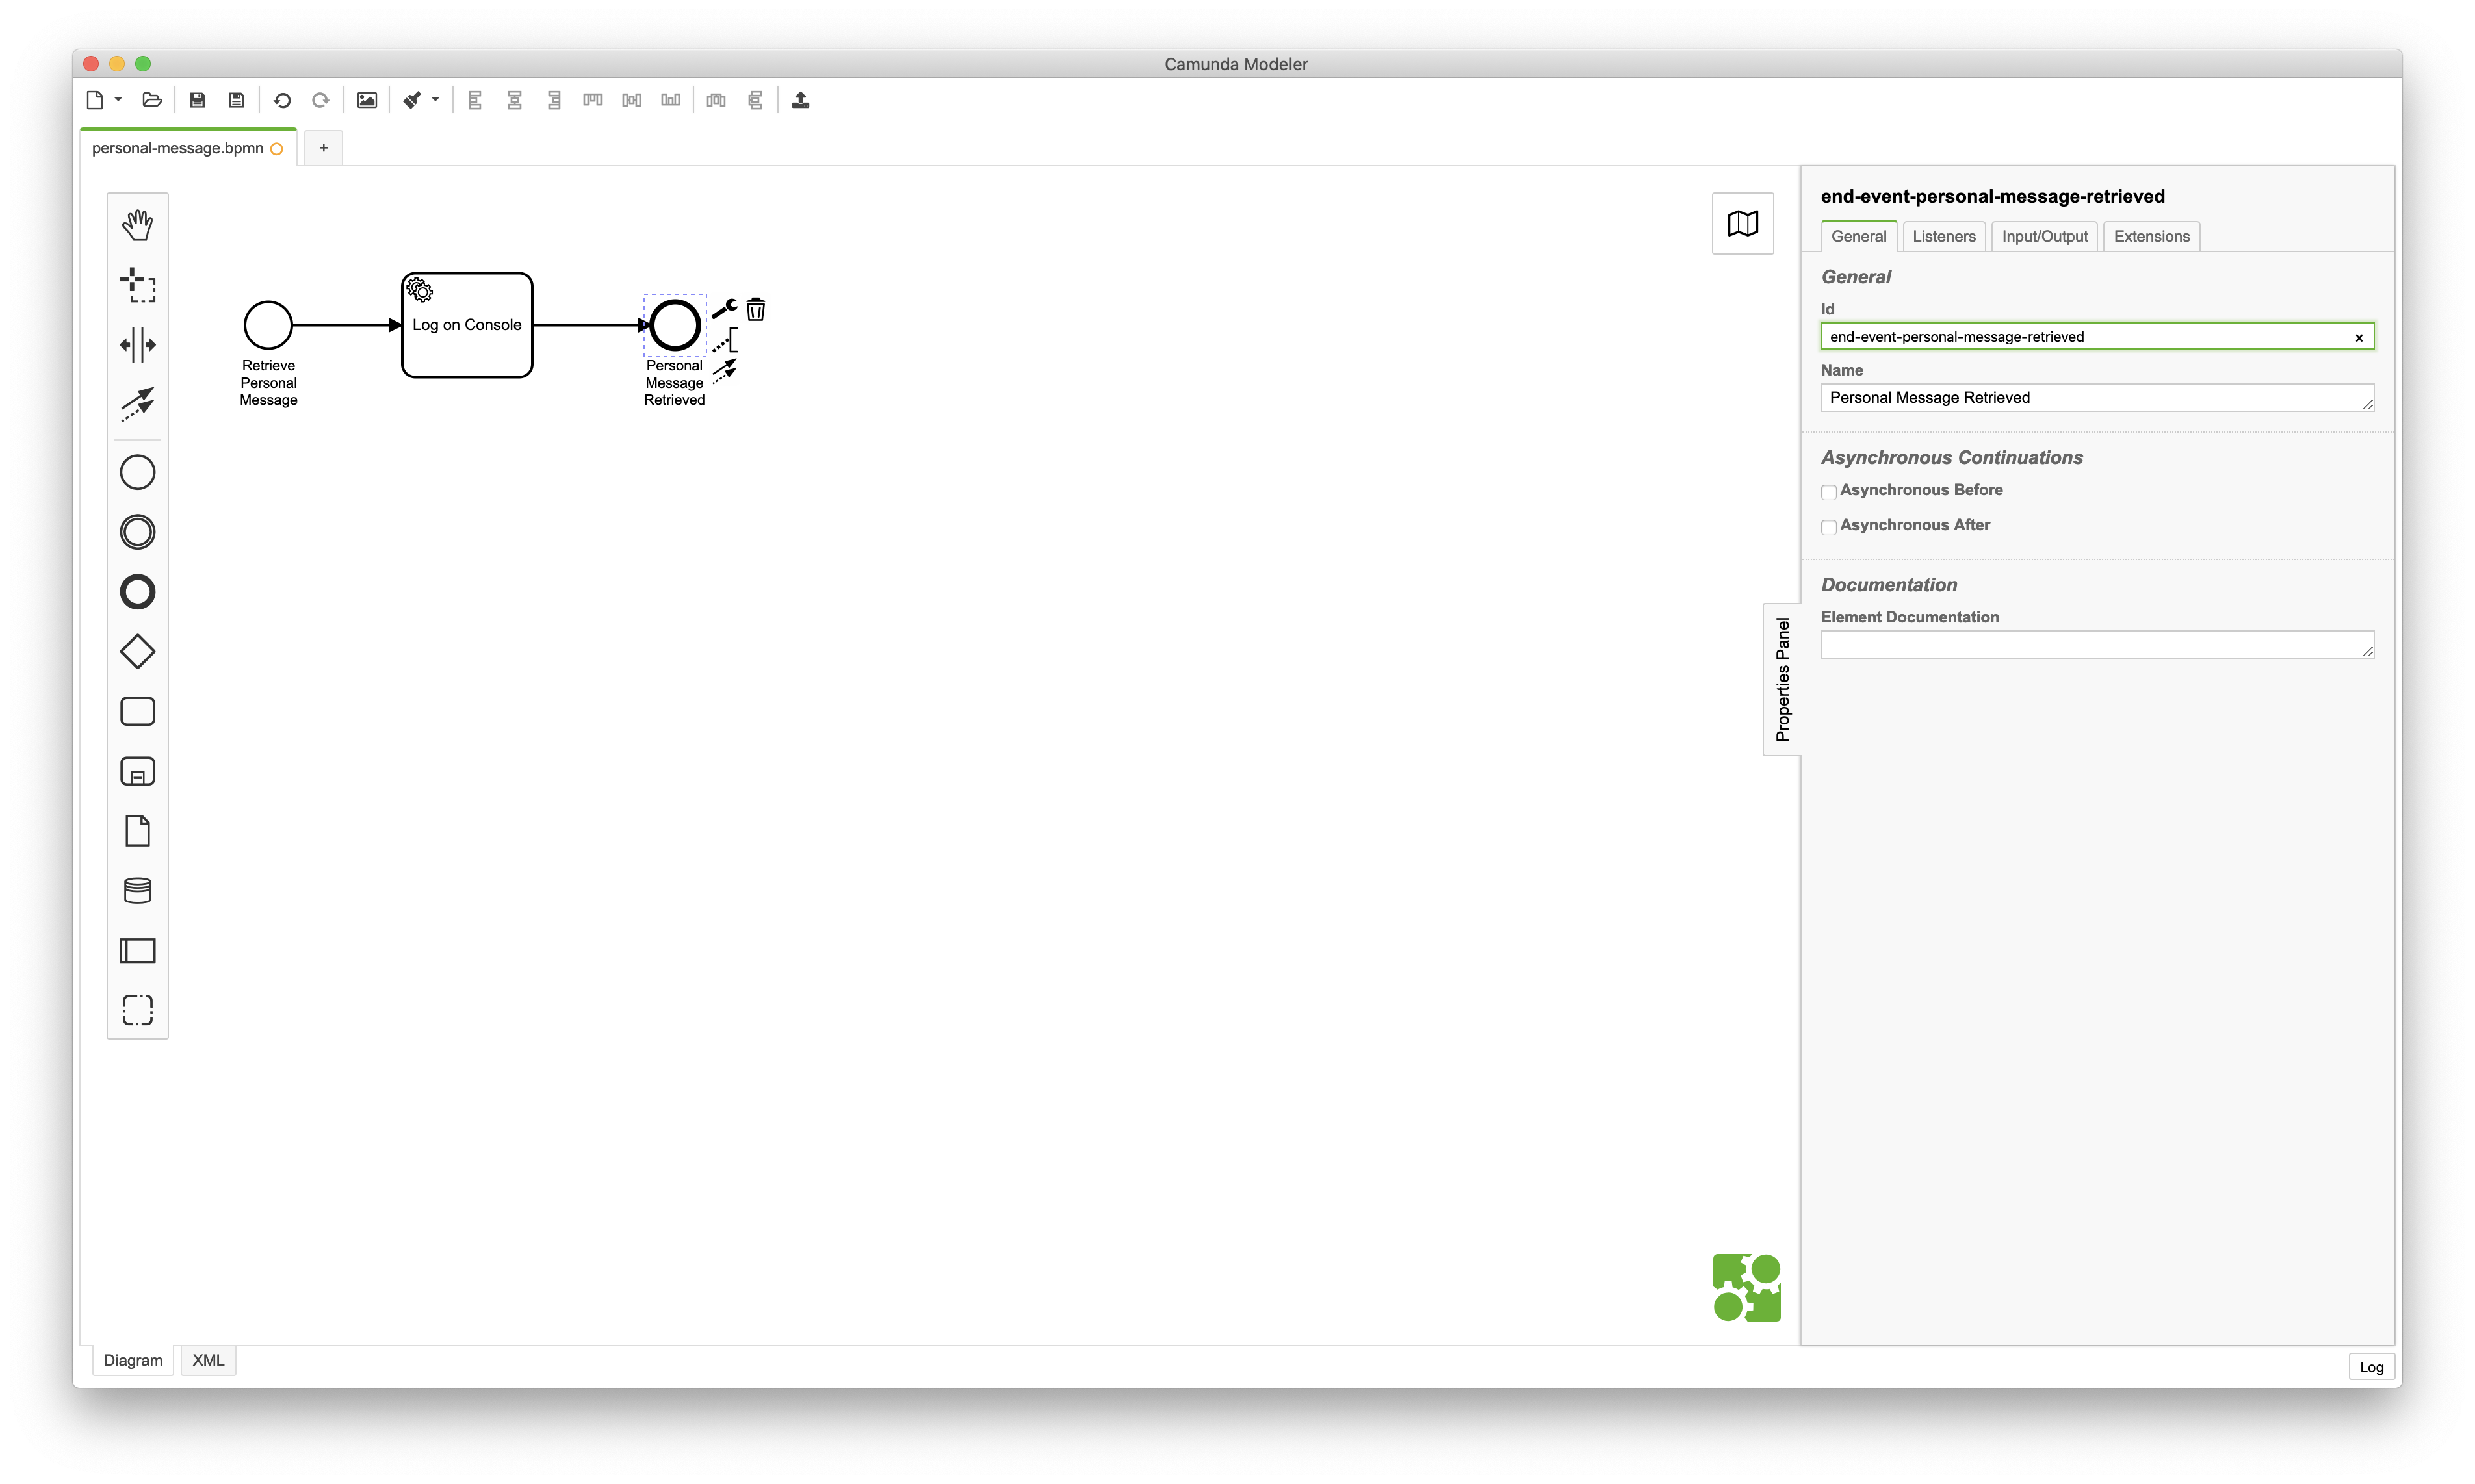
This post contains a step-by-step guide on how to create a simple BPMN flow using Camunda Modeler. The BPMN flow is called “Personal Message” and contains a single service task that invokes an external service that logs the personal message out to the console.
Getting Started
The following list defines the technologies and libraries I used to implement the sample code:
Code Example
The code example can be downloaded from Github from the button below. After you have downloaded the code onto your machine, you can open the file in Camunda Modeler.
Step 1: Create a New BPMN Diagram
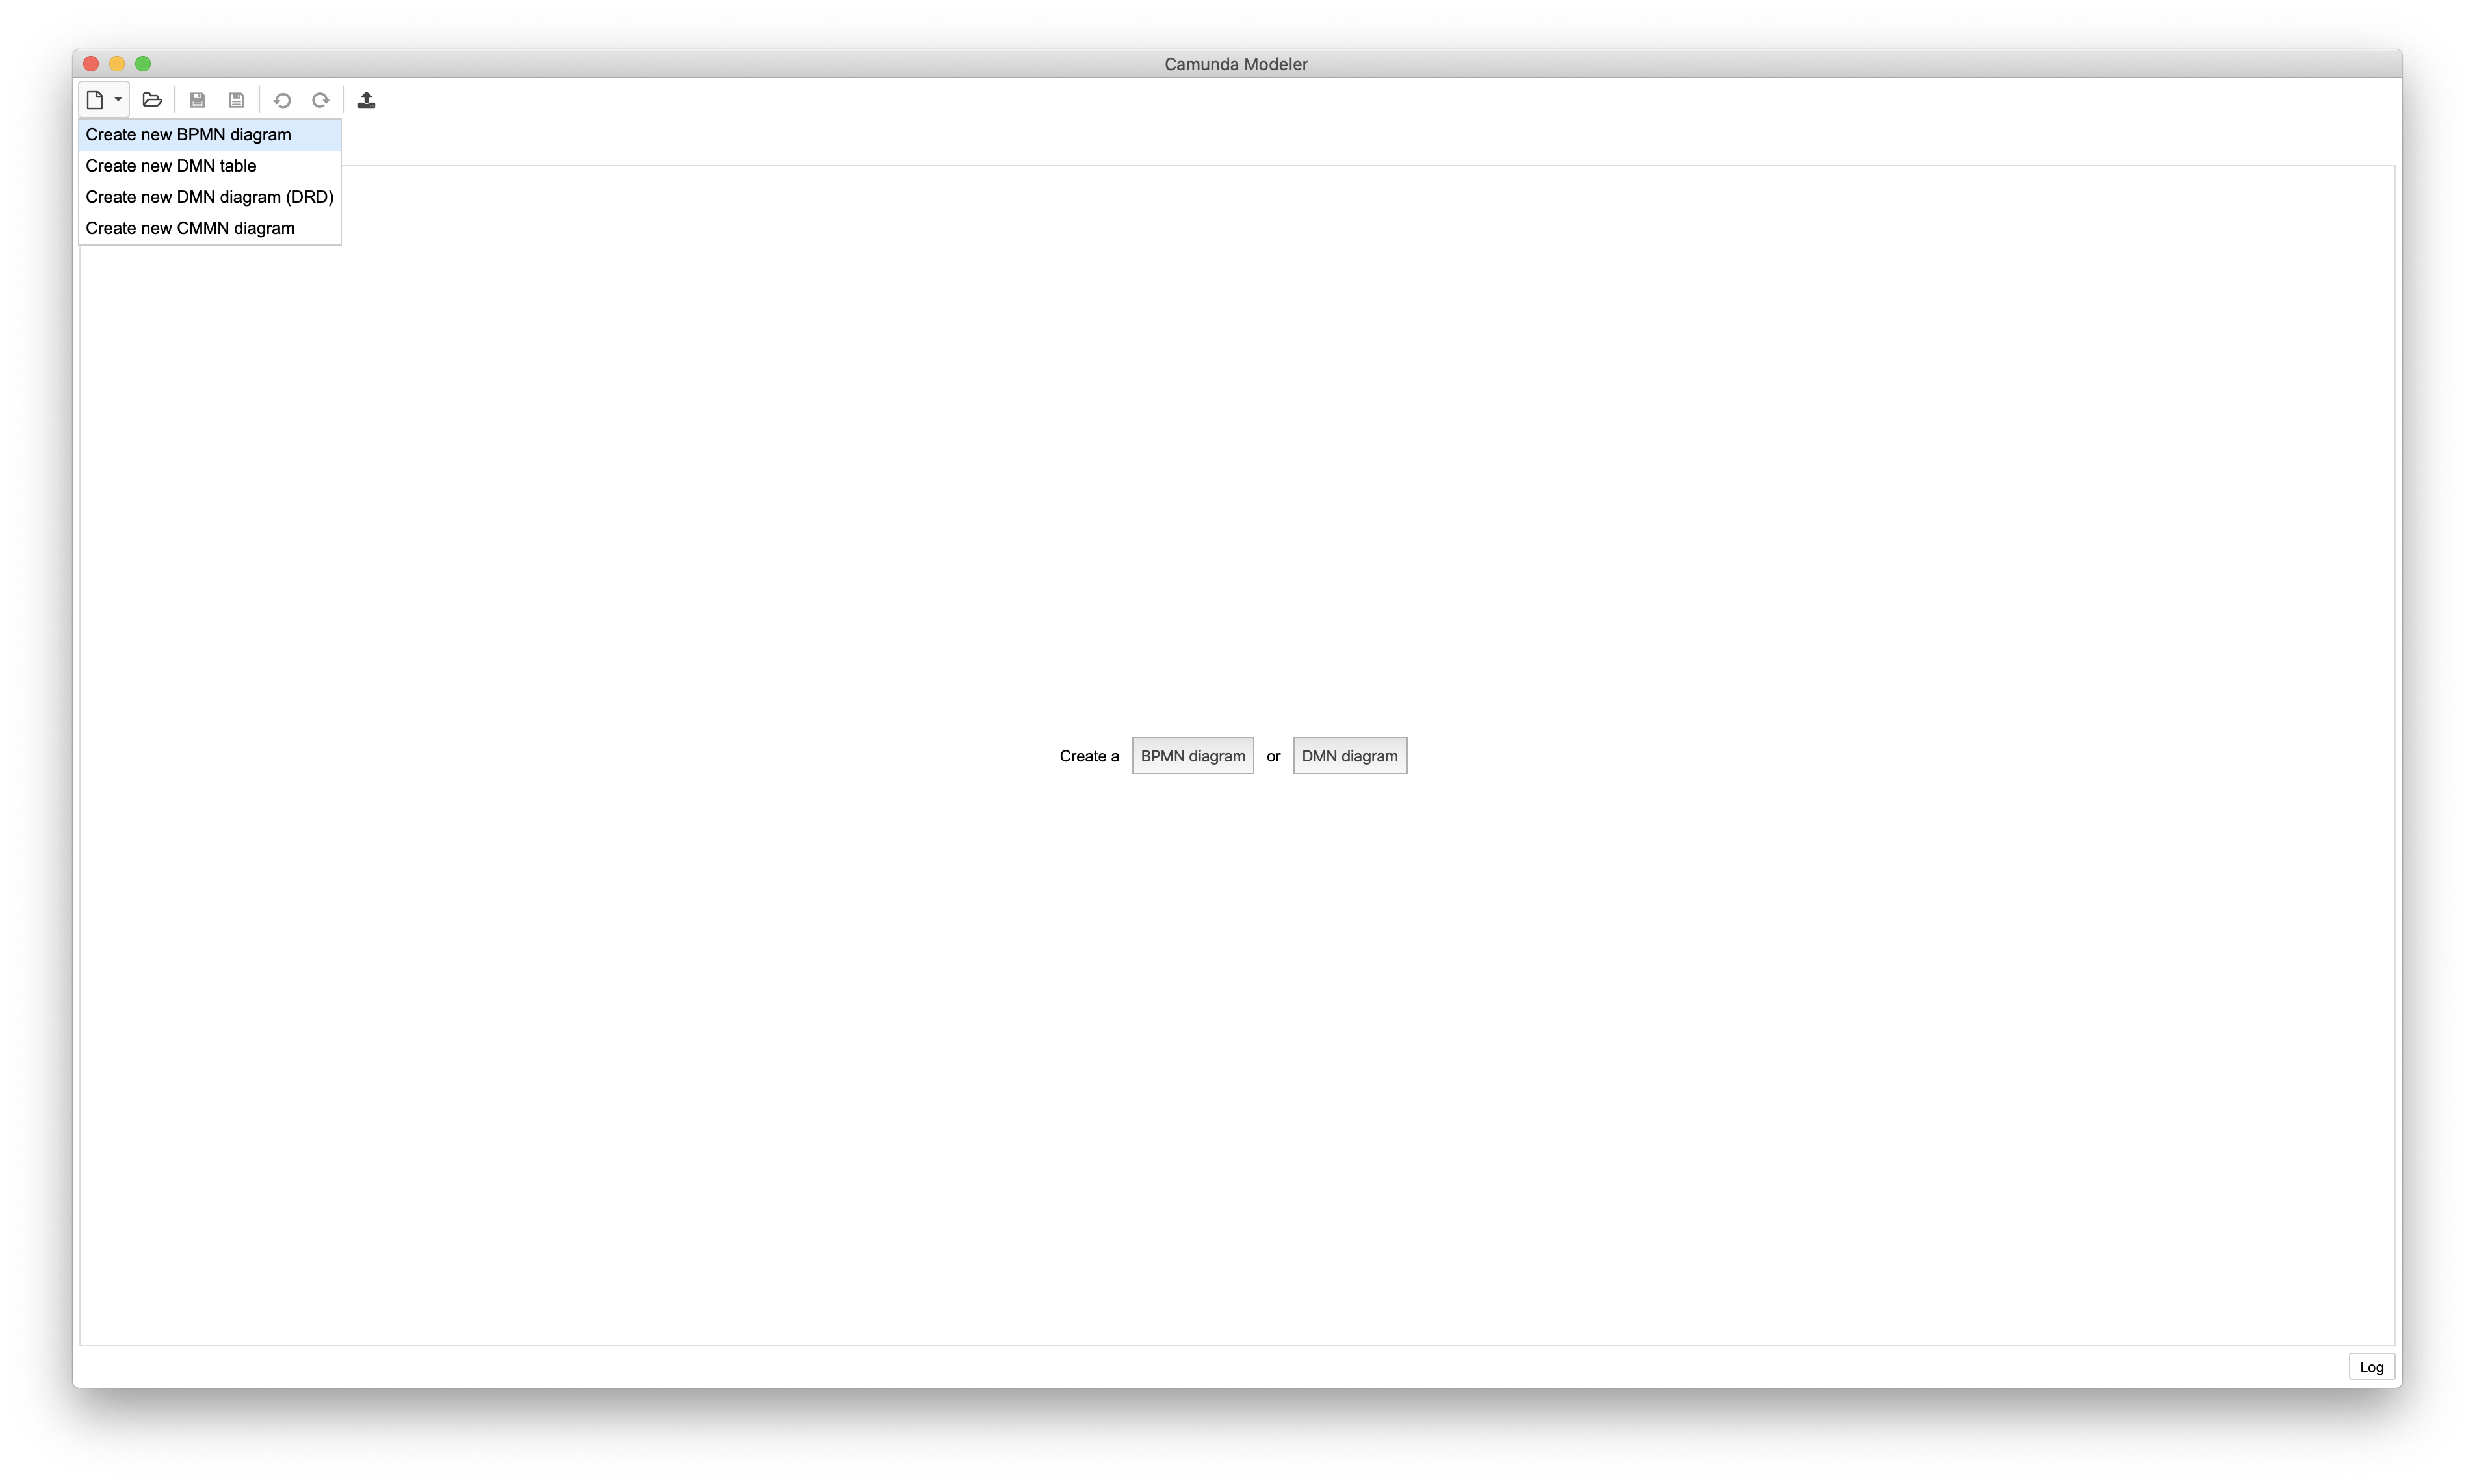
The first step is to create a new BPMN Diagram. There are several options to perform this task; the simplest is to make use of the new diagram button and select the Create new BPMN Diagram menu option. Alternatively, you can make use of the menu options in the following order:
- File > New File > BPMN Diagram
Click To Enlarge
Step 2: Save the BPMN Diagram
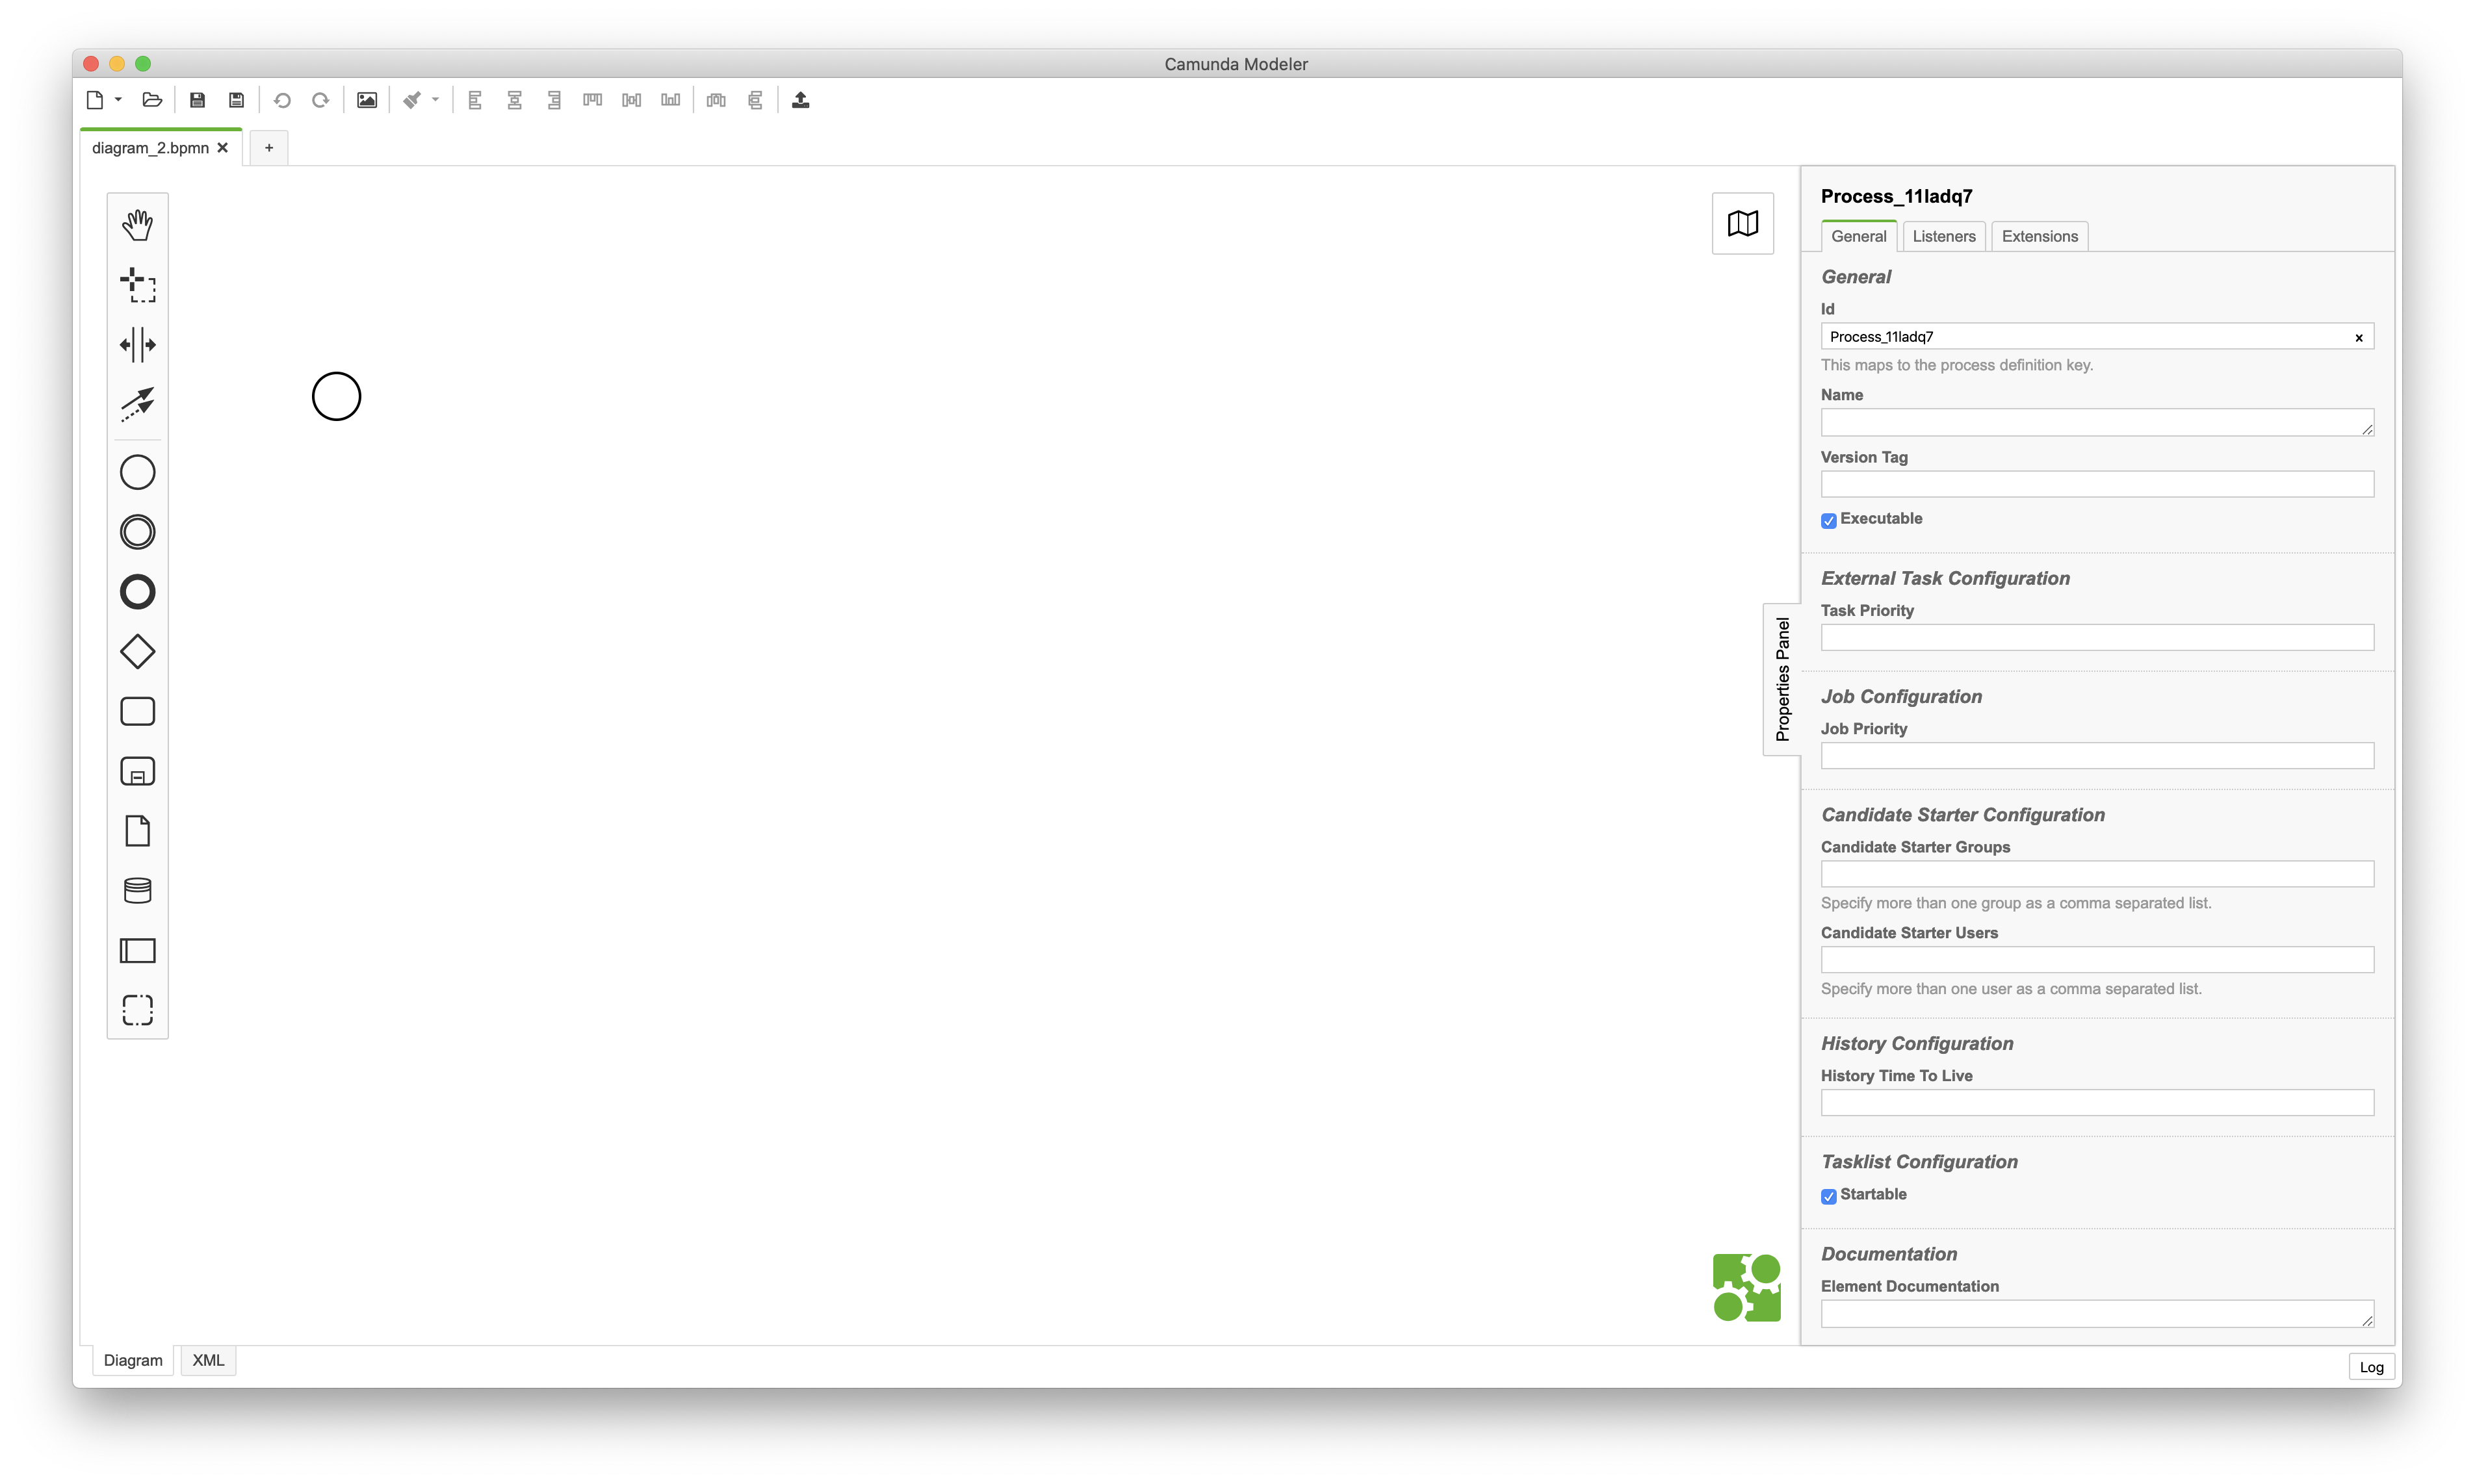
The second step is to save the BPMN Diagram to ensure that you do not accidentally lose your work. Again there are several options, but the simplest is to make use of the save diagram button. You can also make use of the menu options in the following order:
- File > Save File
I saved the BPMN diagram as personal-message.bpmn on my personal computer.
Click To Enlarge
Step 3: Set Process Properties
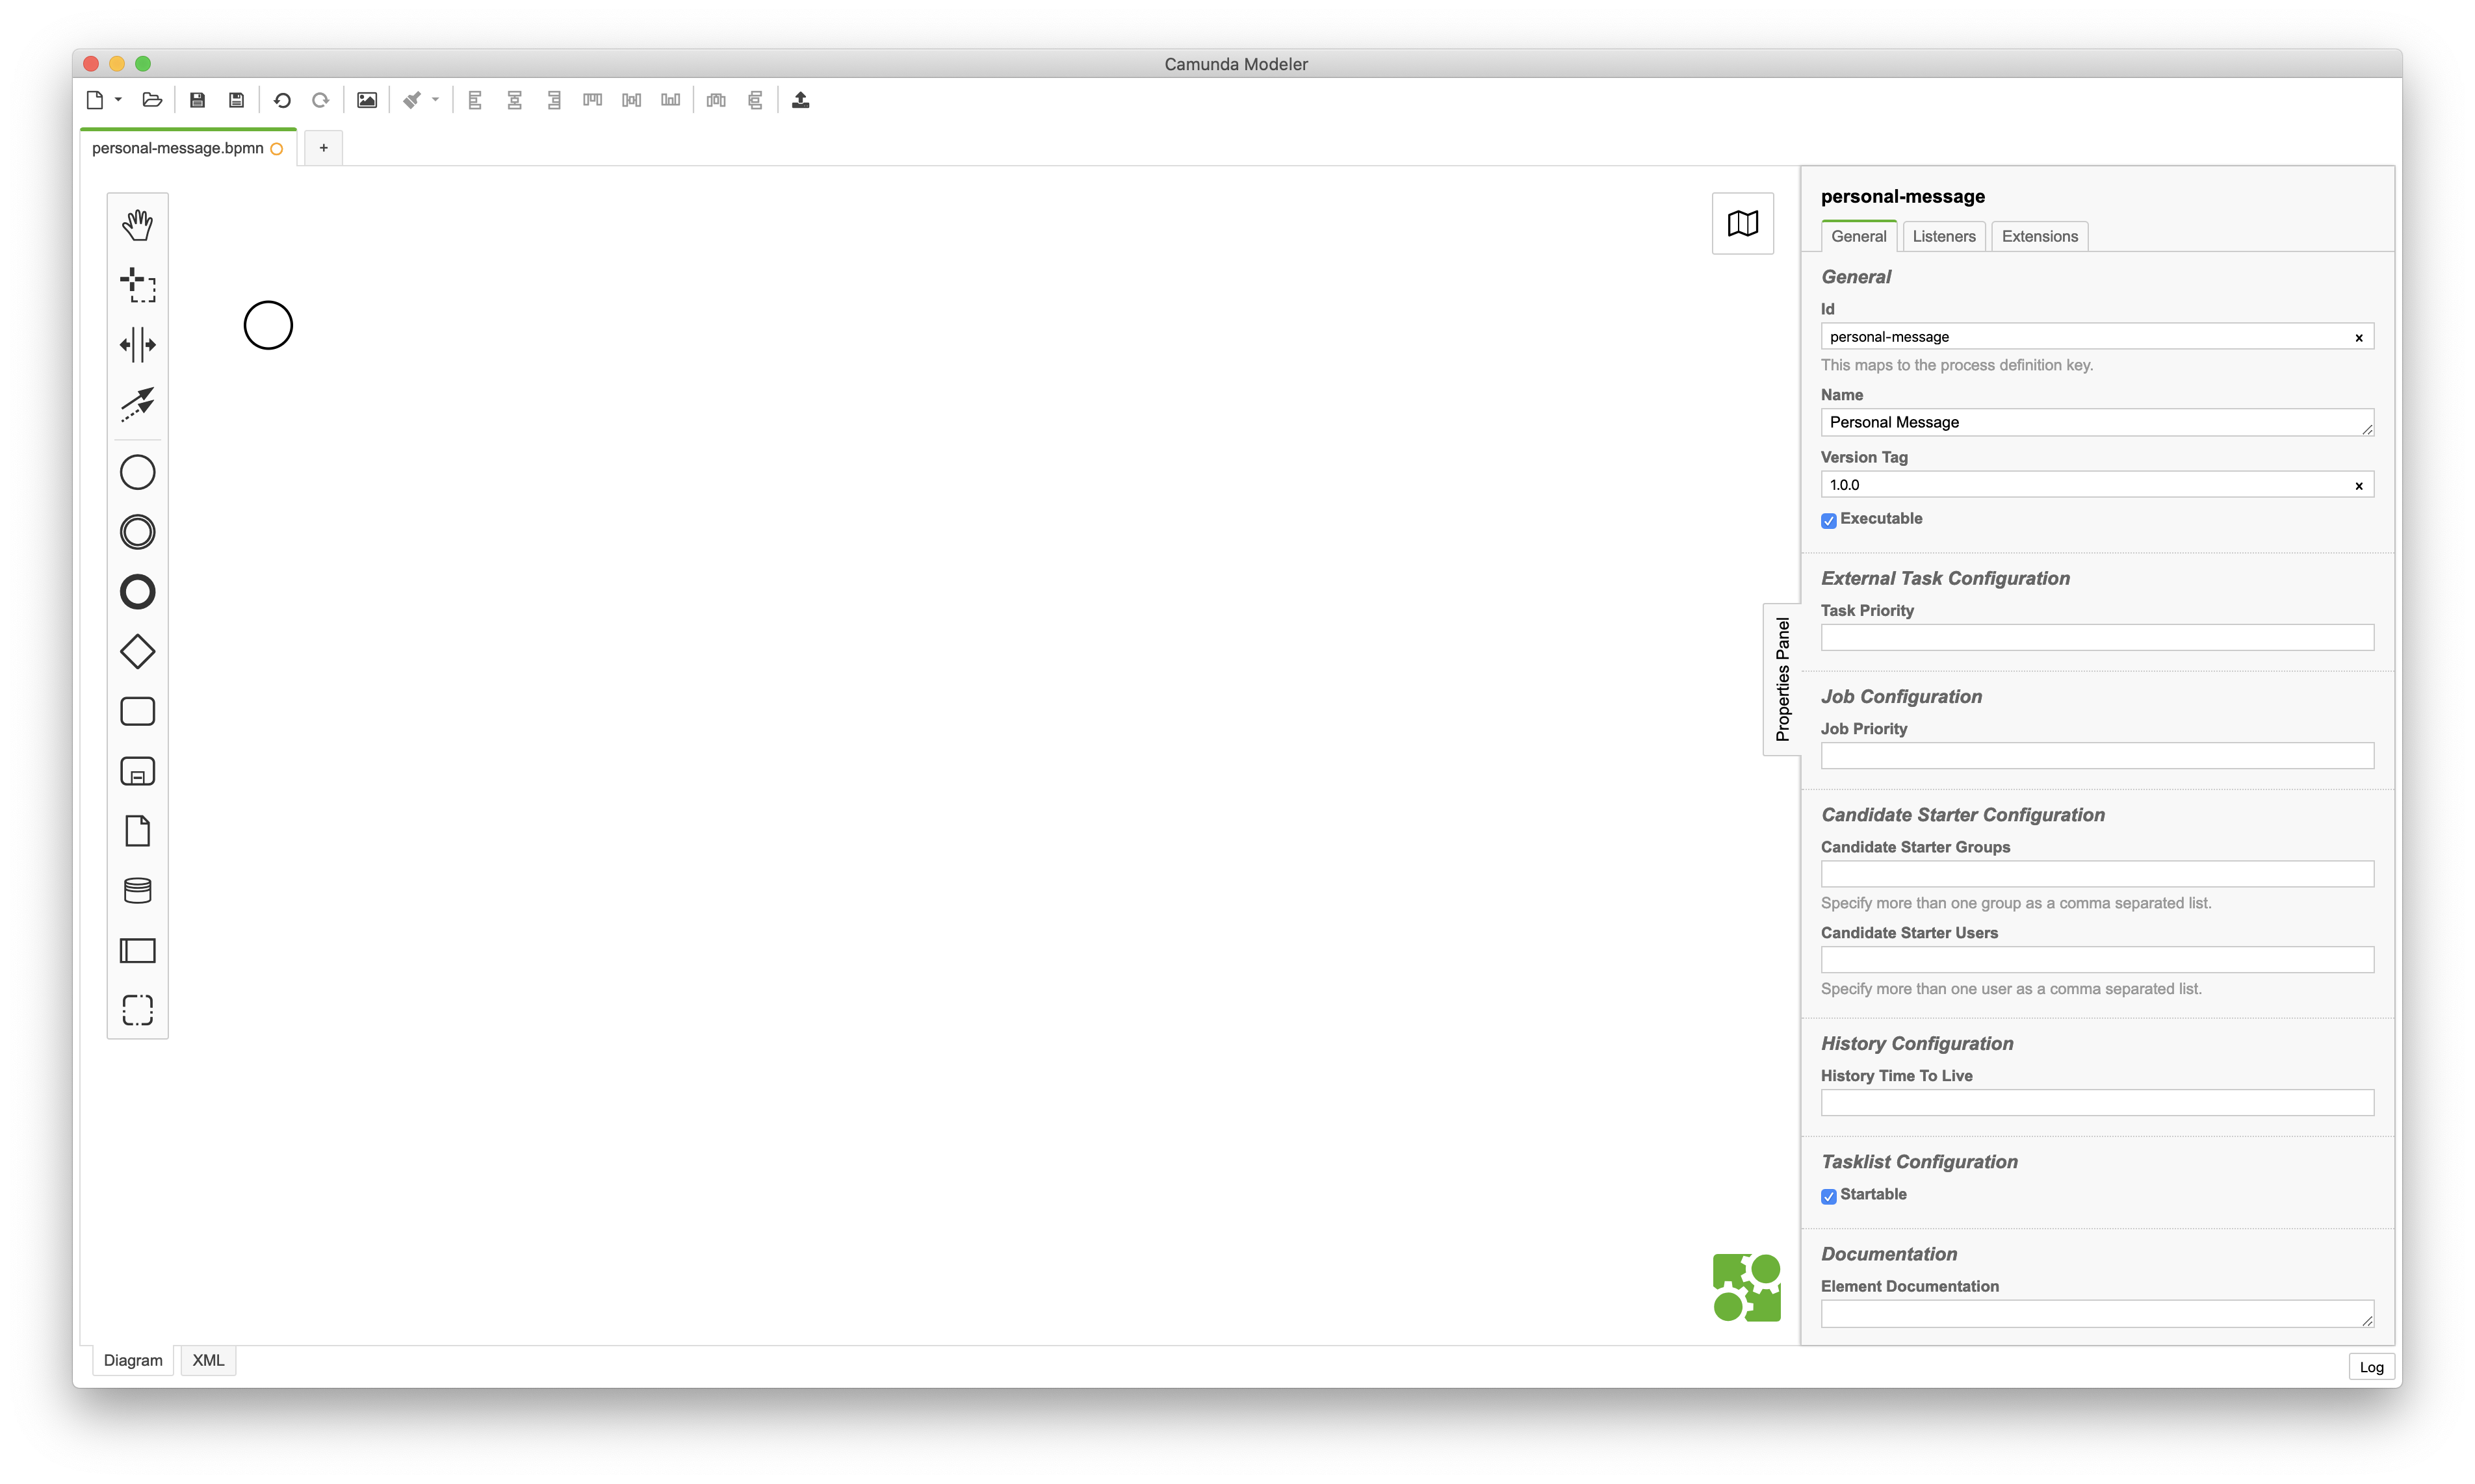
Ensure that you click anywhere on the canvas so that none of the elements are selected. On the left of the modelling canvas, there is a panel that contains all the properties. Once you have selected the General tab, you will see the properties of the process called Id, Name, Version Tag, etc.. Set the properties with the following values:
- Id: personal-message
- Name: Personal Message
- Version Tag: 1.0.0
- Executable: Ticked (Yes)
- TimeToLive: 180
Click To Enlarge
Step 4: Name the Start Event
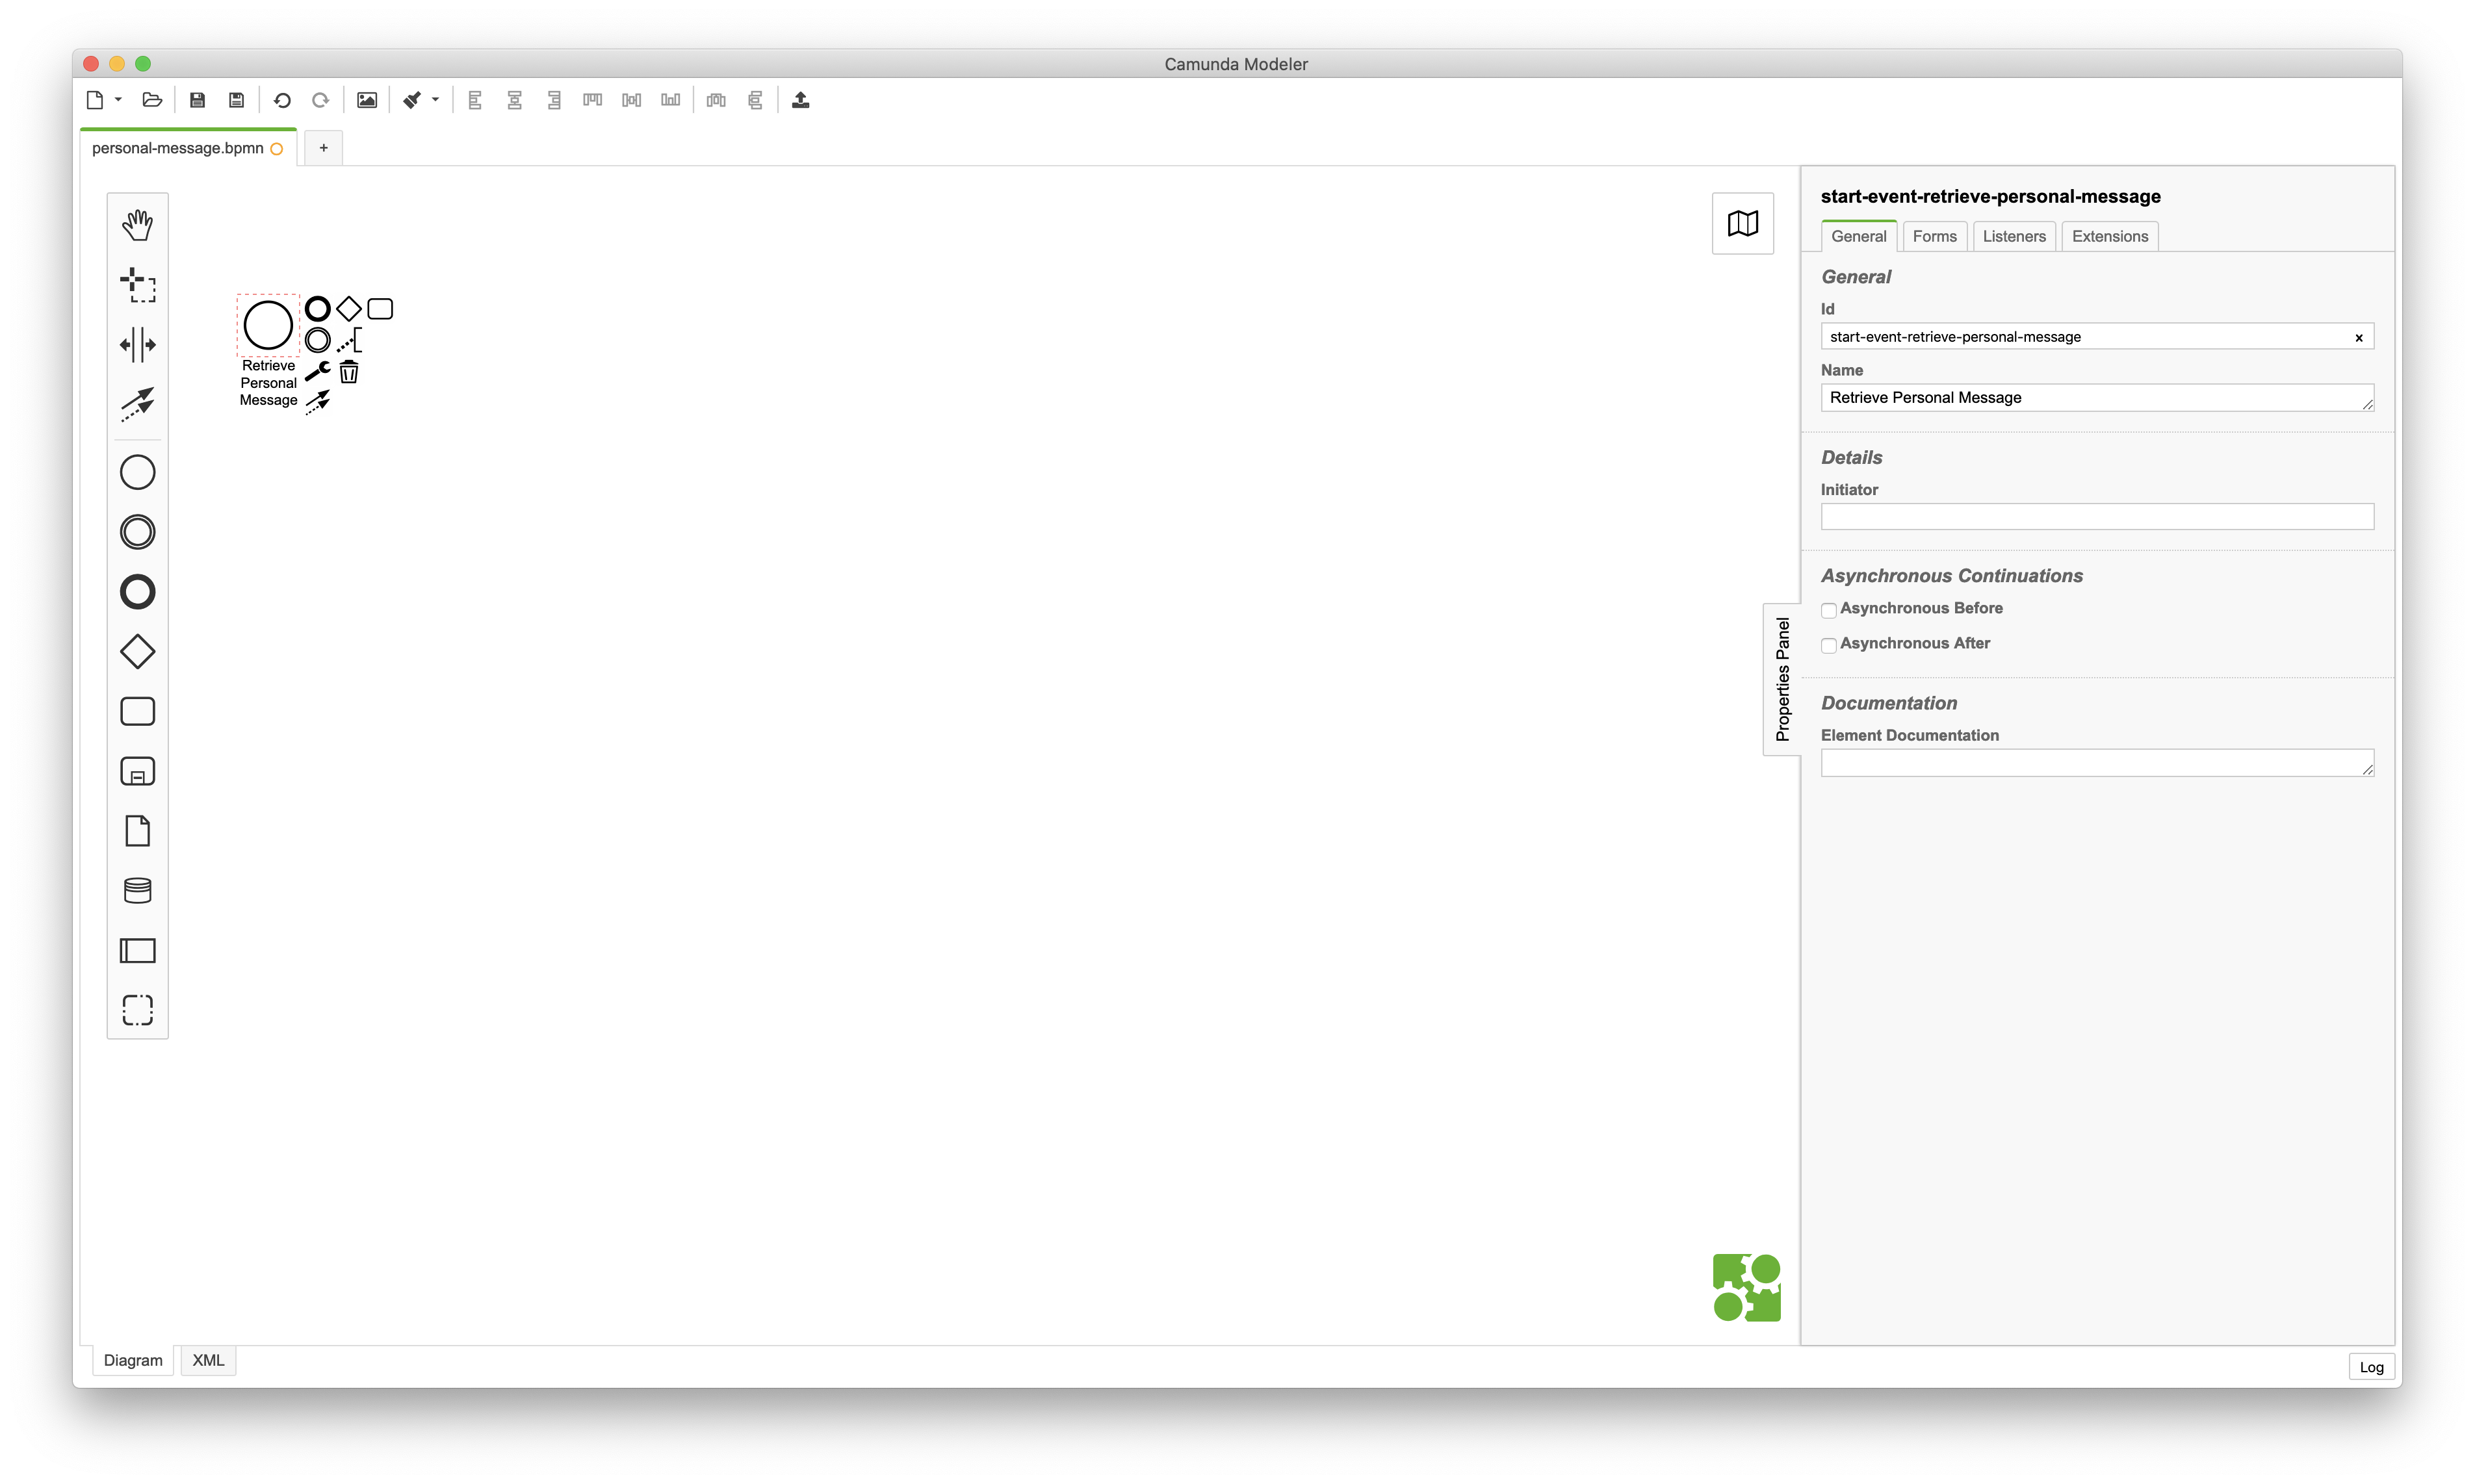
The Start Event is modeled as a circle and is already placed by default on the modelling canvas. To name this event, you can double click on the event and type in the name of the event. You can also click on it once, and set the name in the properties panel under the General tab.
- Name: Retrieve Personal Message
Click To Enlarge
Step 5: Create and name the Task
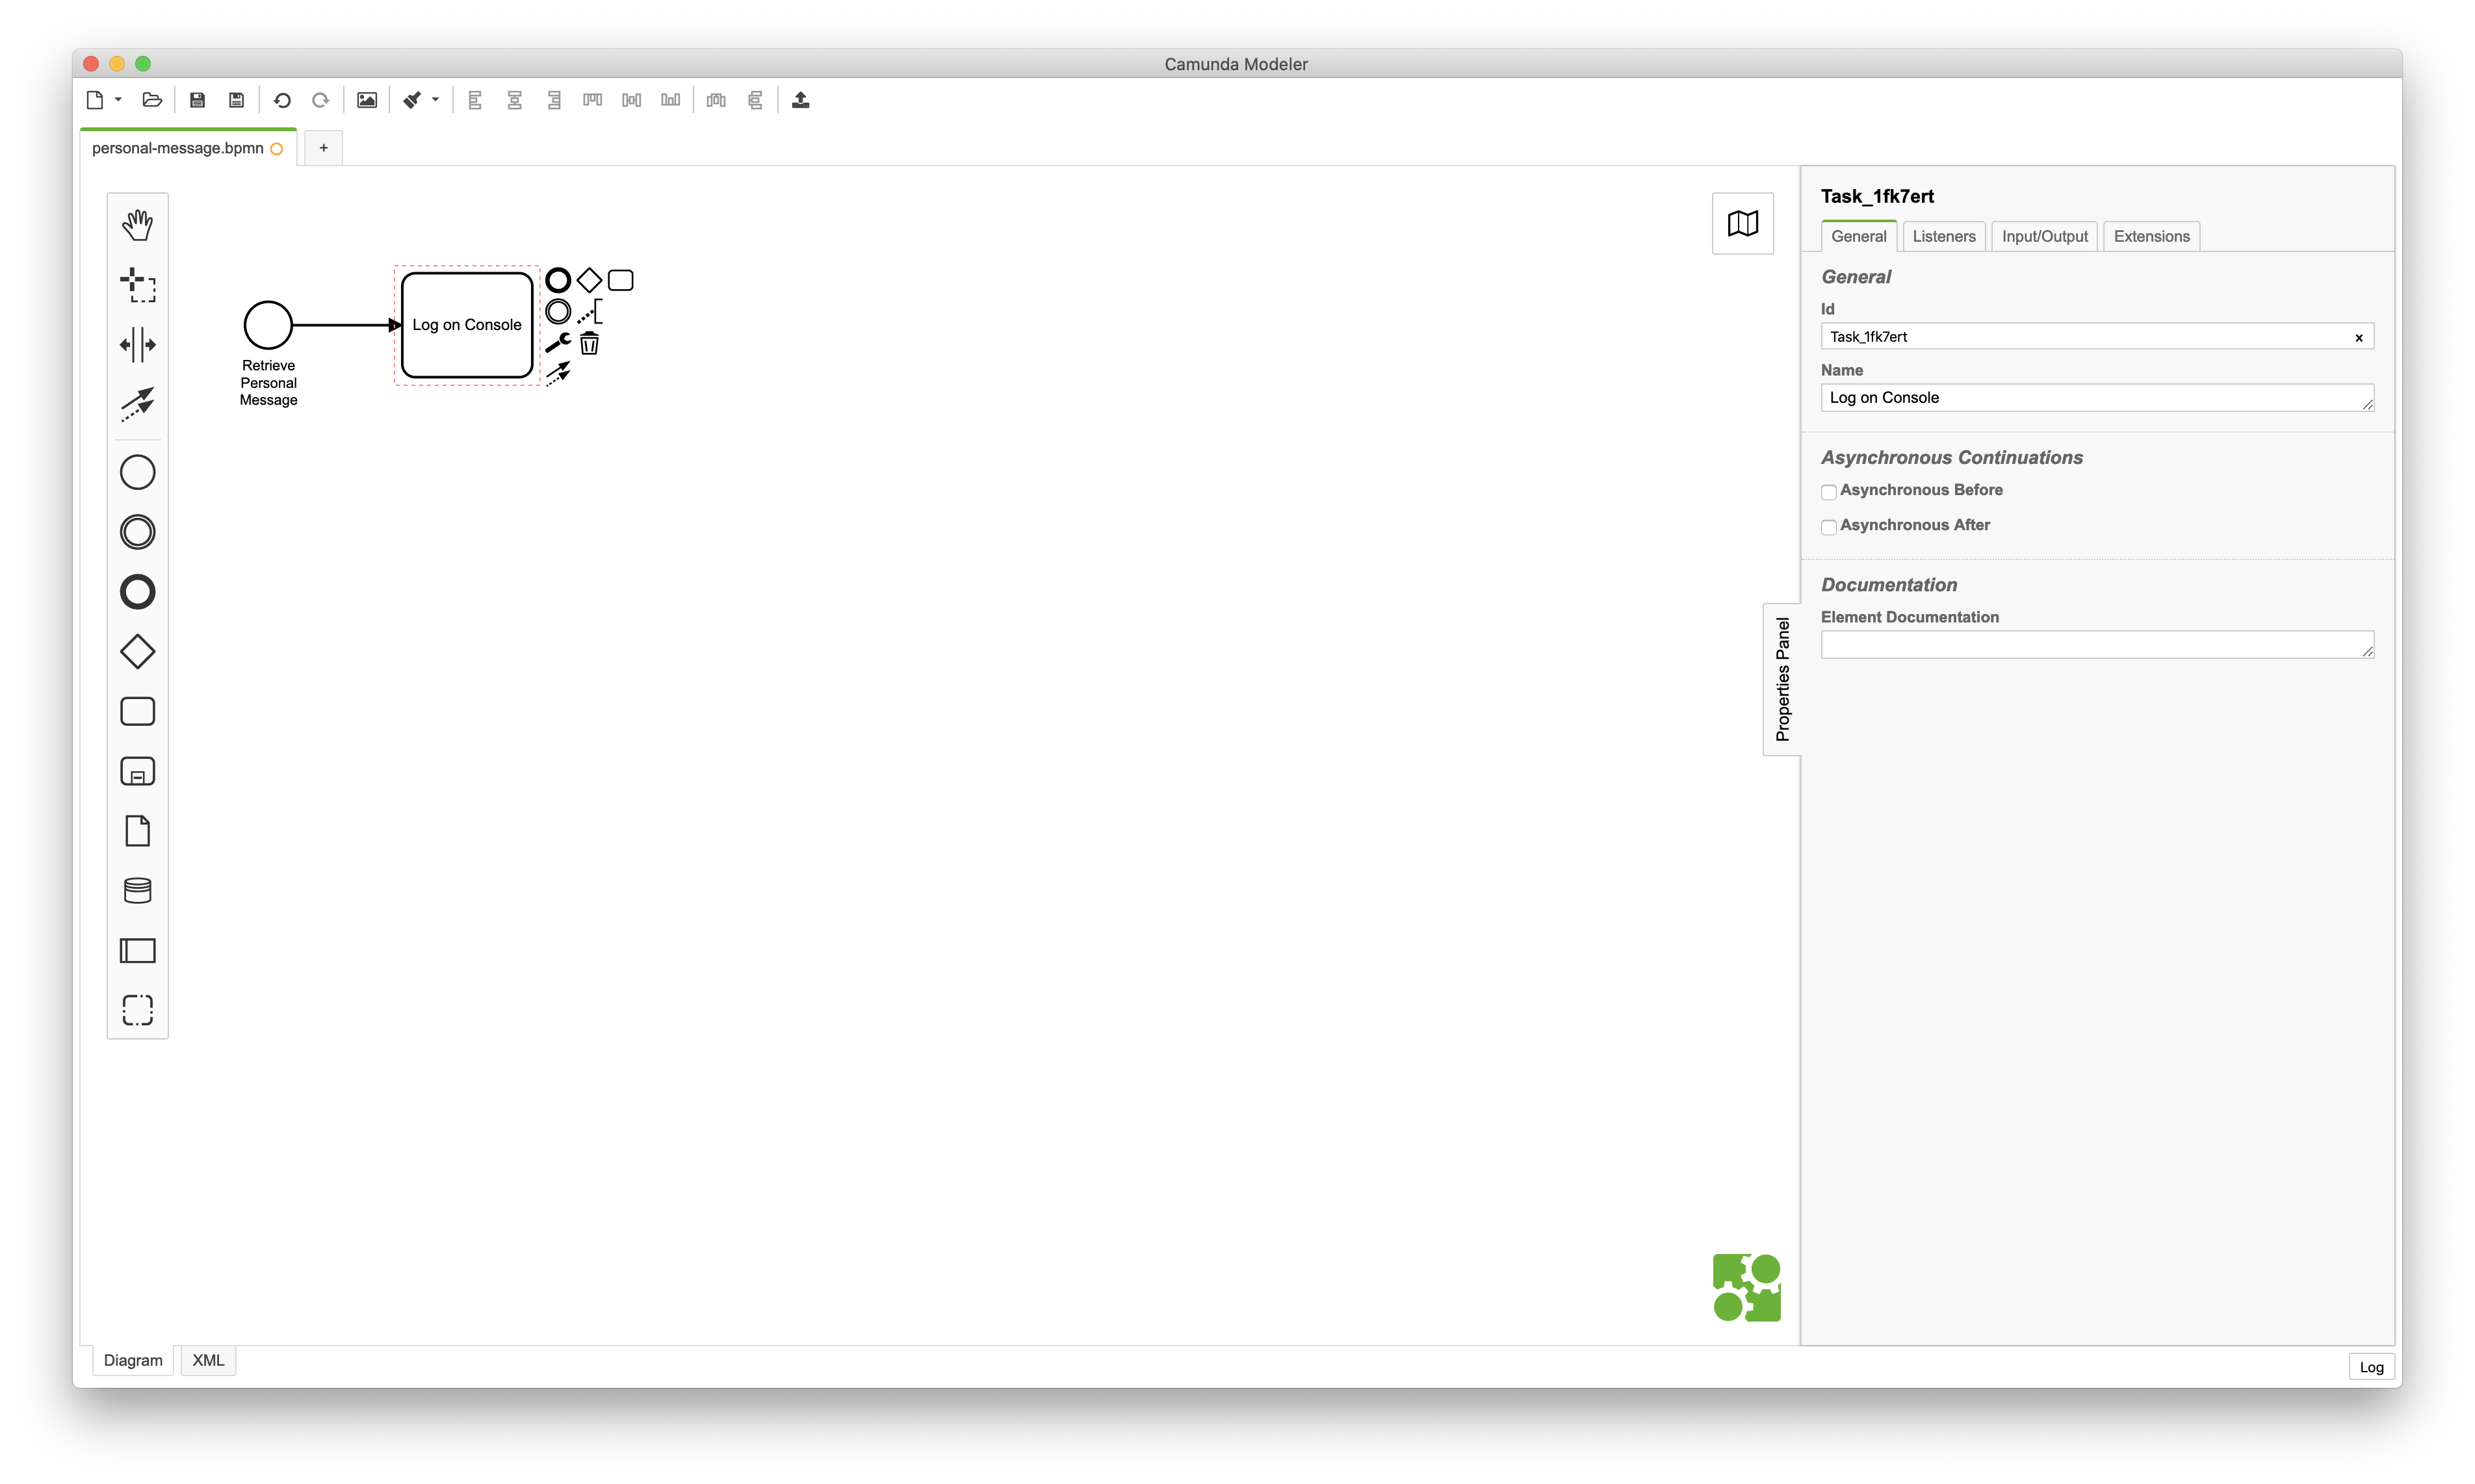
The next step is to append a task to the Start Event. Once you have clicked on the event once, you will see multiple options to the right of the event. You can select the Append Task option which will create a task as the next step of your flow. To name this task, you can double click on the task and type in the name of the task. You can also click on it once, and set the name in the properties panel under the General tab.
- Name: Log on Console
Click To Enlarge
Step 6: Change Task Type to Service Task
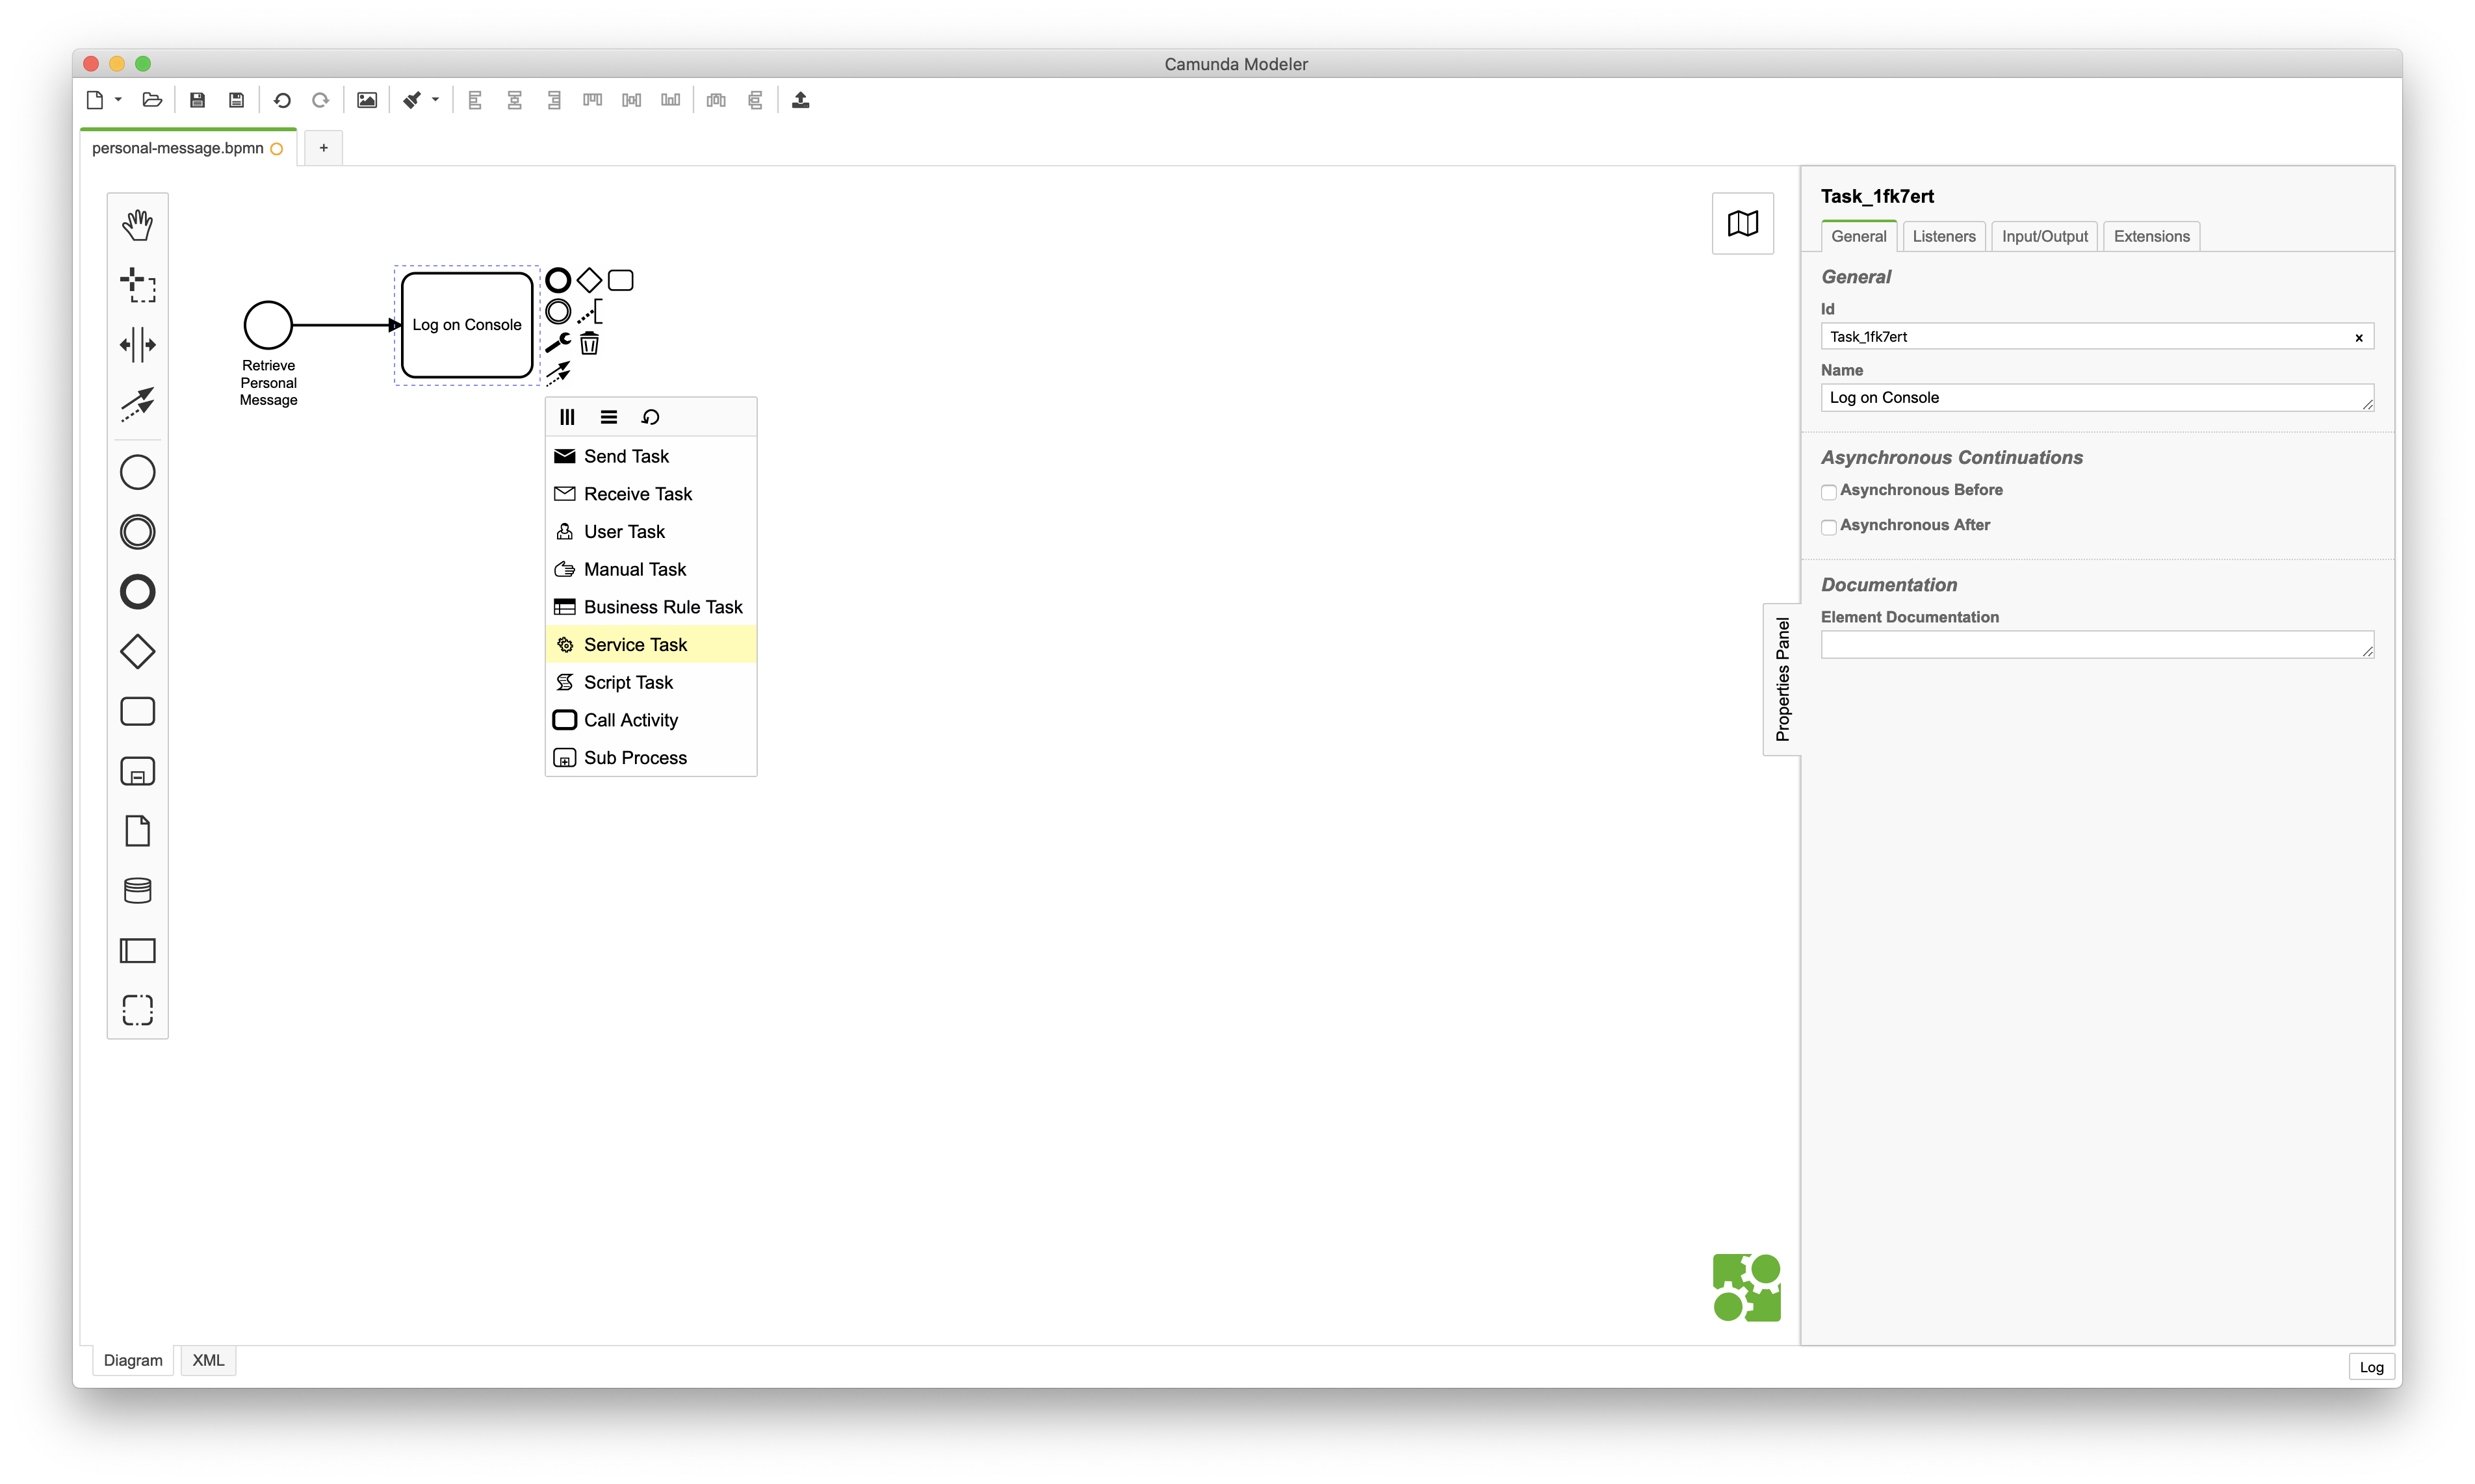
Task types specify the nature of the action that will be performed as part of the process. In this example, we will change the task to a Service Task. Click on the task once to see the multiple options (icons) to the right of the task. The wrench icon allows you to change the type of the task. Select the Service Task option from the menu after you have clicked on the wrench icon.
Click To Enlarge
Step 7: Set the Task Properties (General)
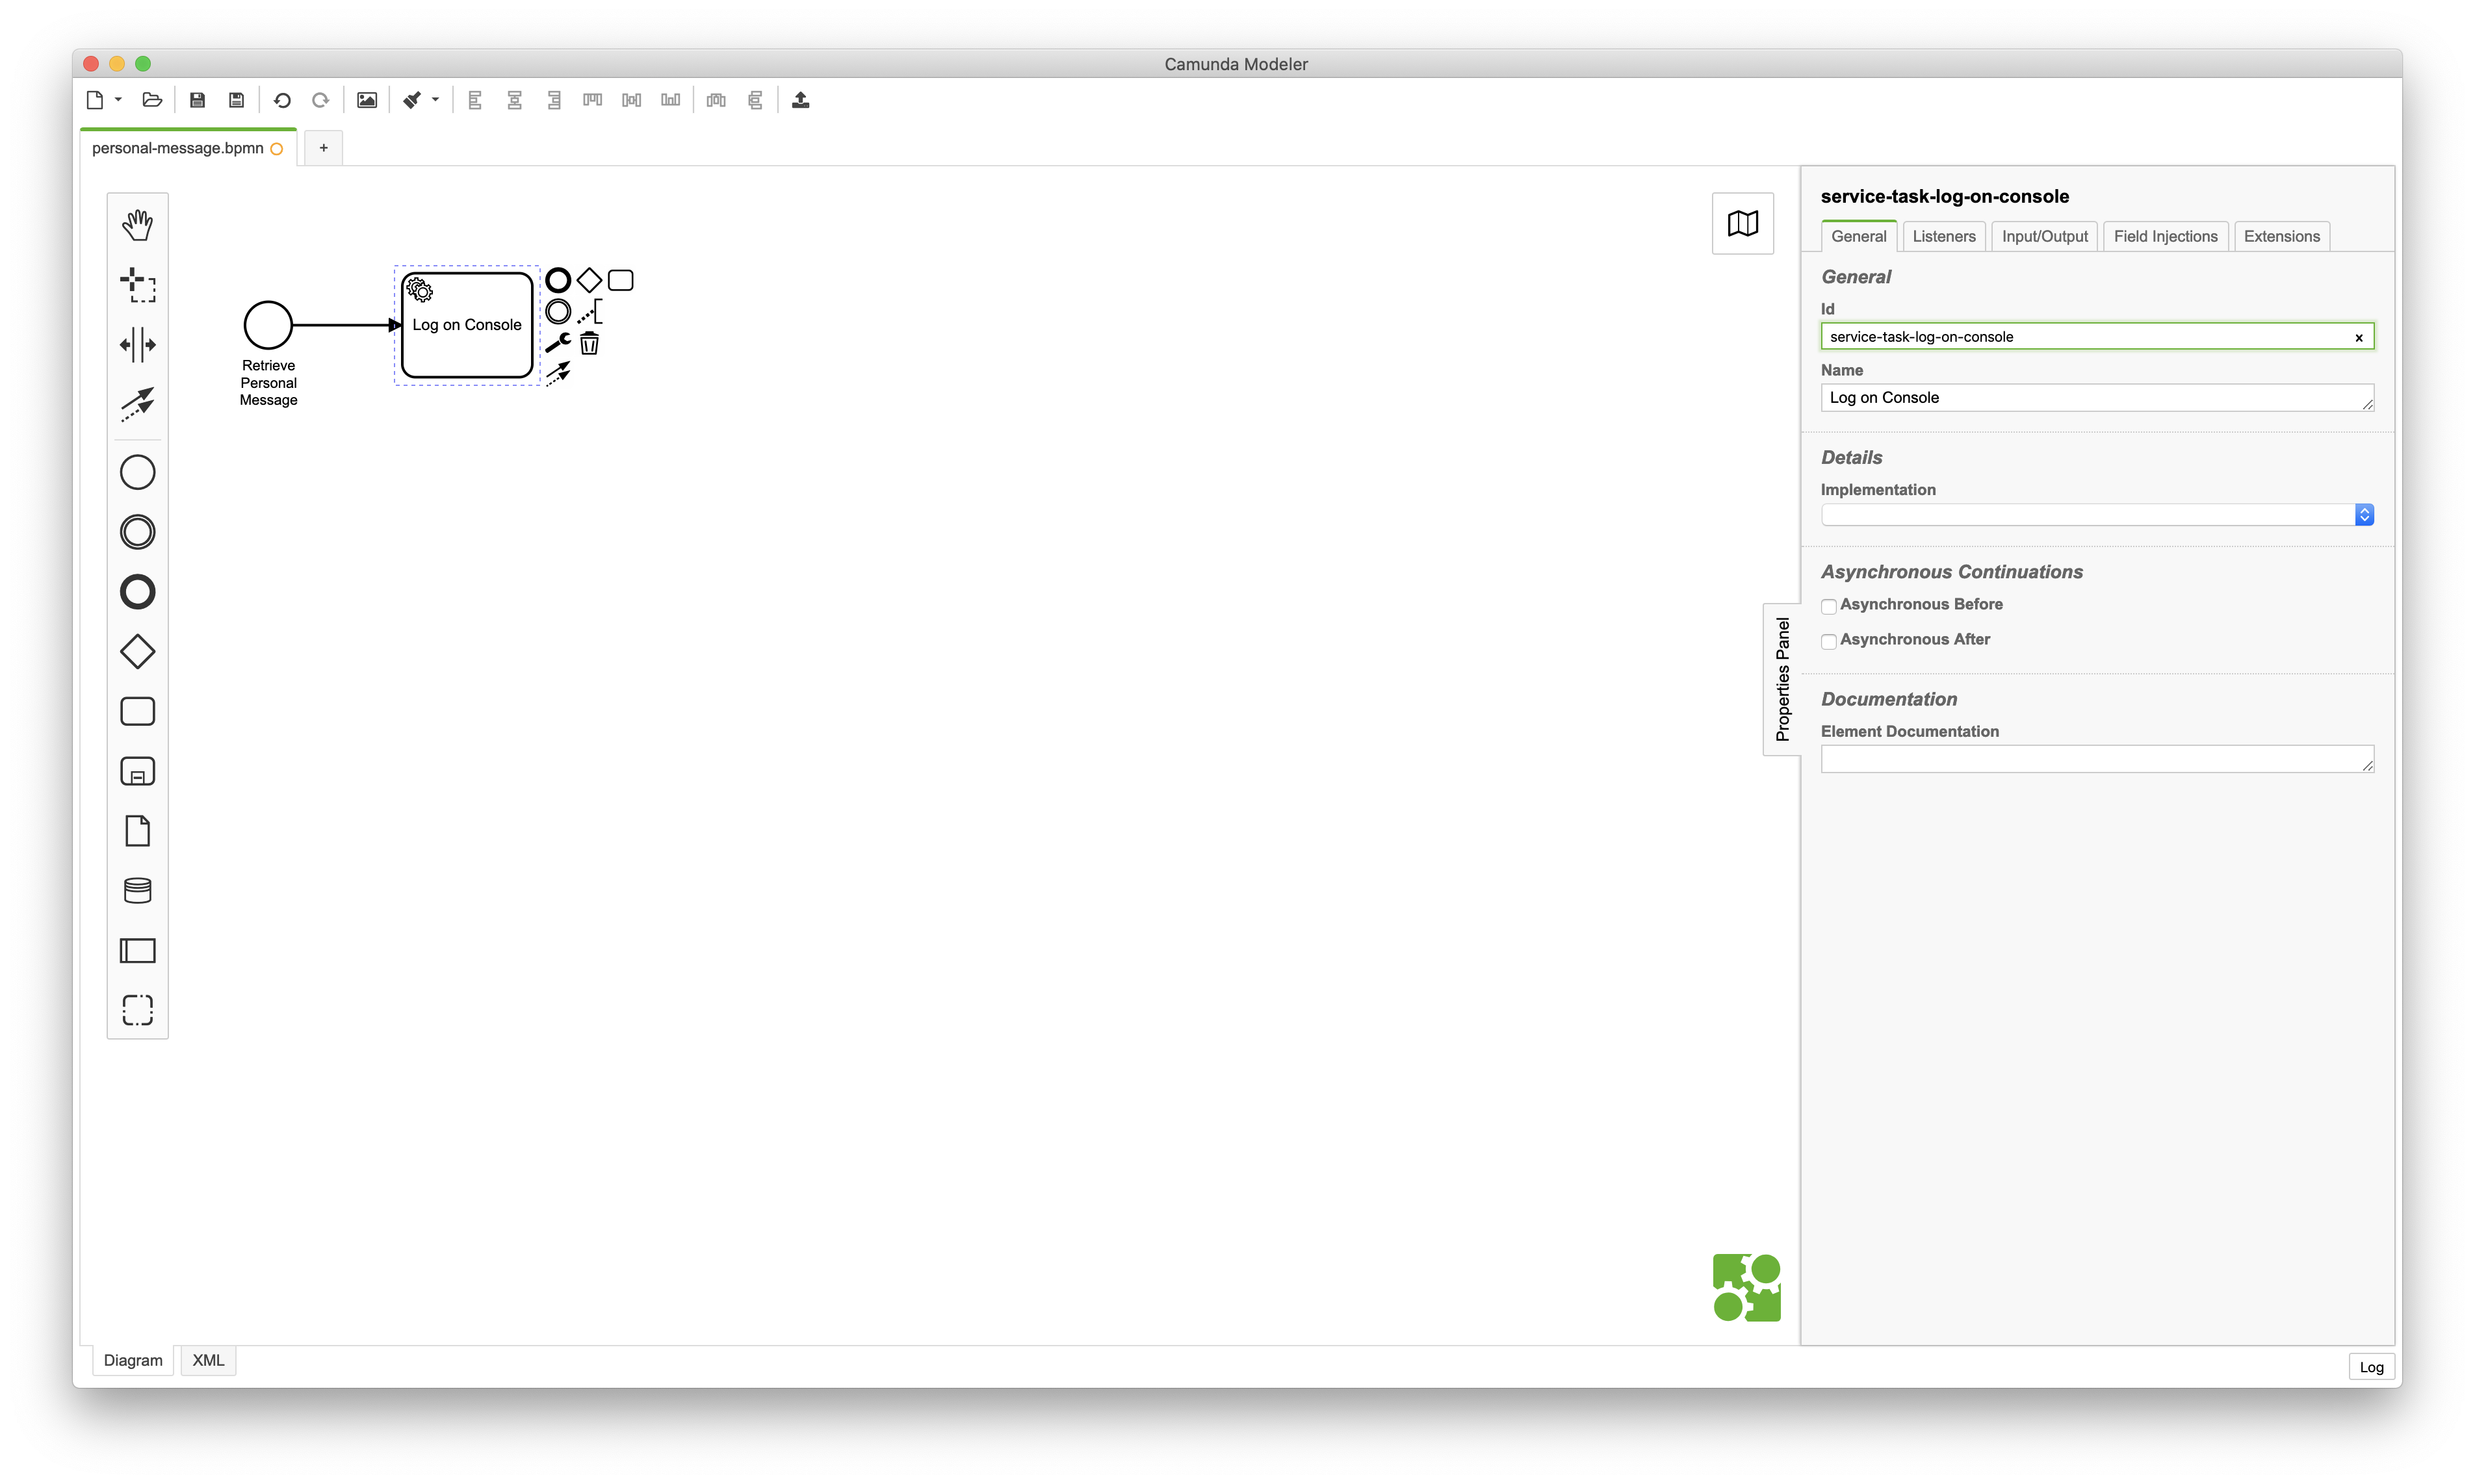
Ensure that you click on the service task to display the properties of the task in the properties panel. Once you have selected the General tab, you will see the properties of the task called Id, Name, etc.. Set the properties with the following values:
- Id: service-task-log-on-console
- Name: Log on Console
The implementation details evaluates an expression that resolves to a delegation object. This will be used in other examples to invoke a Java Delegate with the name logger.
Click To Enlarge
Step 8: Set the Task Implementation
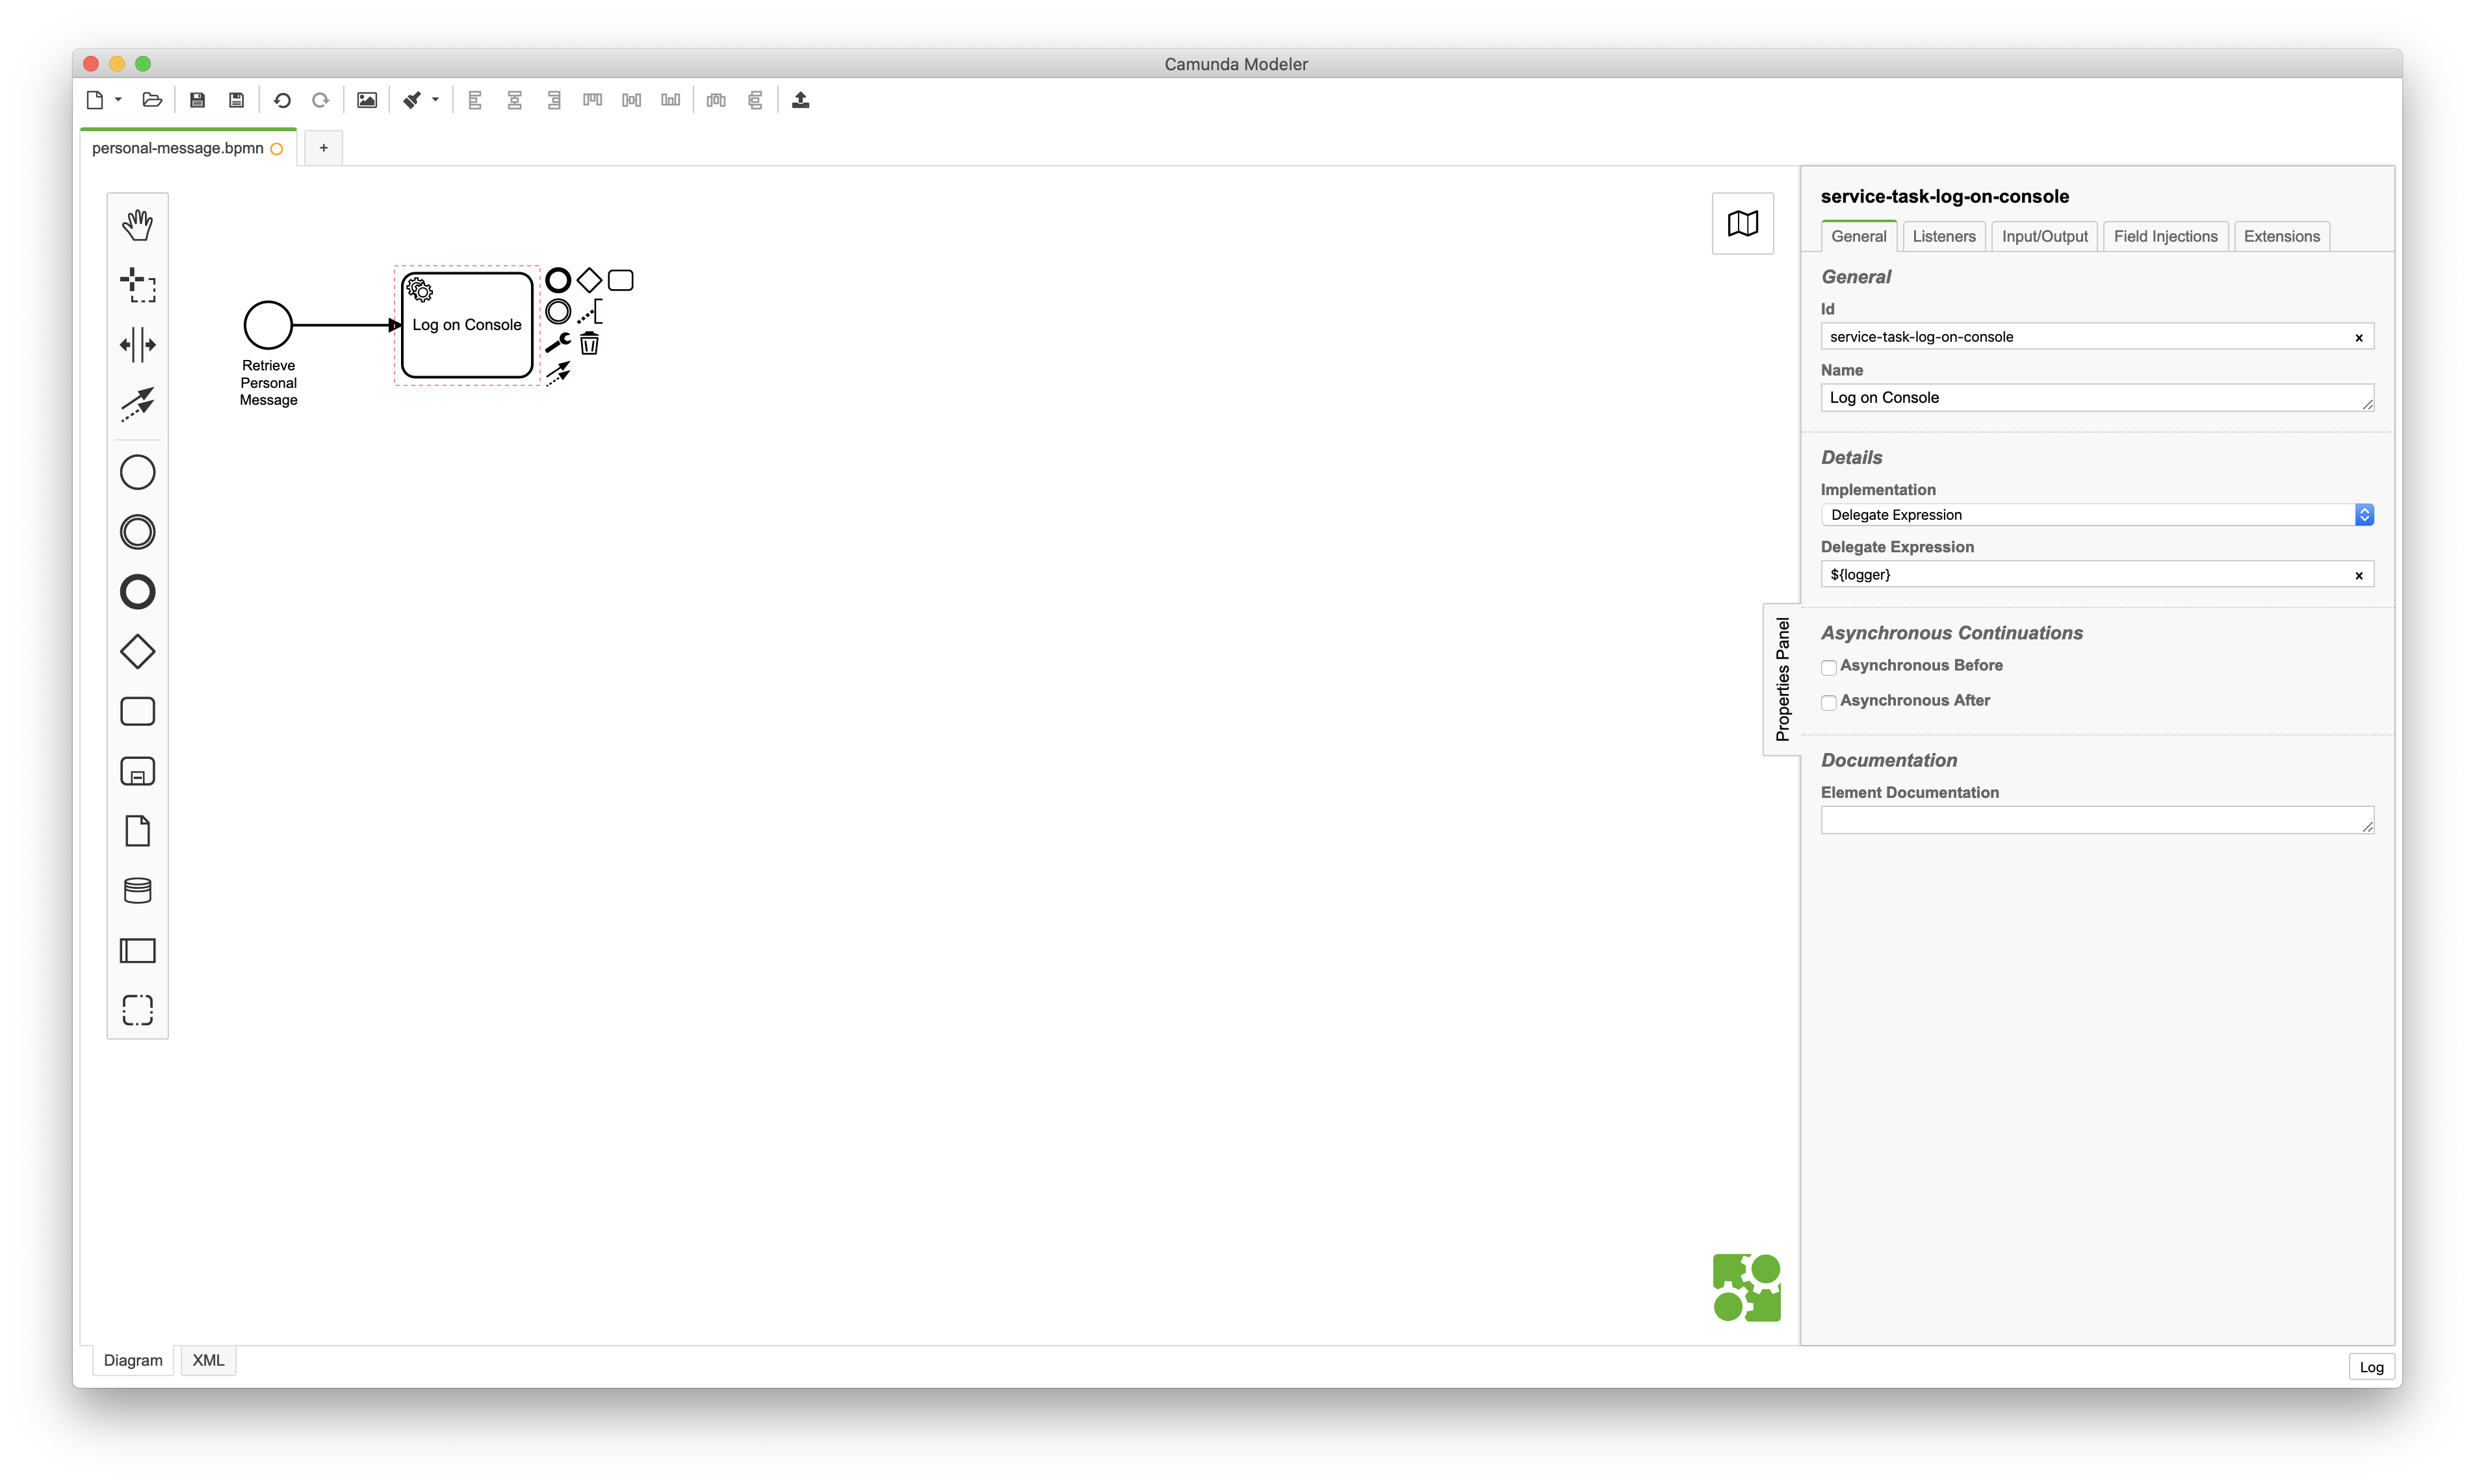
After you have set the general properties of the service task, you must also configure the implementation details. Ensure that you are on the General tab of the properties panel. In the details section of the tab, you will find the implementation details. Add the following values into the properties:
- Implementation Details: Delegate Expression
- Delegate Expression: ${logger}
Click To Enlarge
Step 9: Create End Event
The final step is to create an End Event for our process. Click on the service task once to see the multiple options (icons) to the right of the task. Select the dark bold circle the append an End Event after the task. To name this event, you can double click on the event and type in the name of the event. You can also click on it once, and set the name in the properties panel under the General tab.
- Name: Personal Message Retrieved
Click To Enlarge
Remember: Save the Process
As you have already saved the process to a specific file, you can only click on the Save icon in the toolbar. Alternatively, you can make use of the menu options in the following order:
- File > Save File
Summary
Congratulations! You have successfully modelled a simple process in the Camunda Modeler. This process contains a single Service Task that will log a personal message to the console. Follow me on any of the different social media platforms and feel free to leave comments.
